- Hammer
- Screwdriver
- Tape measure
- Power drill
- Reciprocating saw
- Craft knife
- Carpenter's square
- Loft ladder
- Screws
- Safety gear (gloves, goggles, etc.)
- Ladder
- Plank of wood
1) Before you begin, it’s worth noting that the entrance hatch leading into your attic may not be a suitable size for your new loft stairs. In this case, you’ll need to cut out a bigger hole using a reciprocating saw, a pencil and measuring tape.
Tip: Please be very cautious of any wires, cables or pipes that could be in the vicinity. It may be a good idea to check with an electrician or plumber beforehand, just to certify everything is safe.
2) Next, you should create what’s known as ‘support battens’. These are designed to support your loft ladder while you securely fasten it in place. Make sure you fit these at the bottom end of the hatch’s opening. Some people choose to remove these once you’ve finished installing, but that’s entirely up to you and isn’t essential.
3) Measure and cut trimmers to the size of your hatch. Trimmers are useful in helping to create a sturdy opening for the loft hatch and ladder. Measure and cut out a trimmer using a plank of wood, and then fix them in place using nails and a hammer.
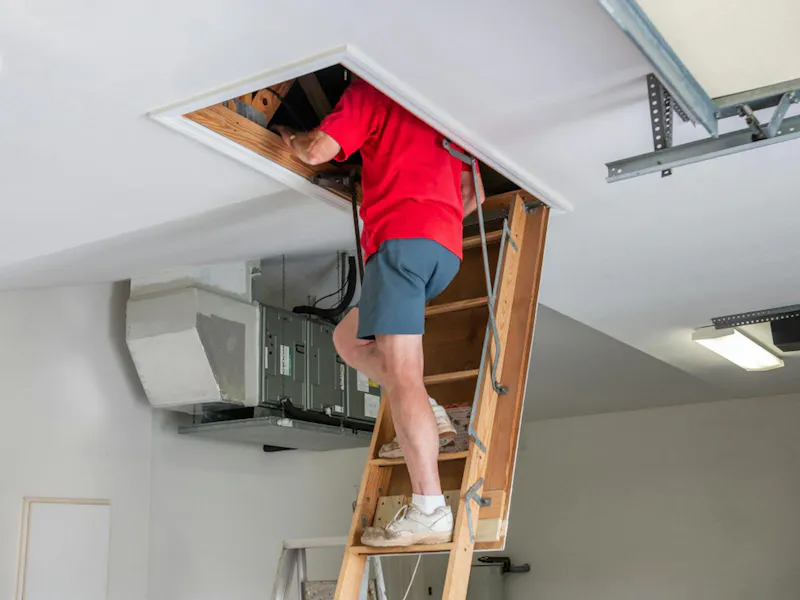
4) For the next step, you will require some assistance, so ask a family member or friend to give you a hand. As a starting position, you will be stood in the loft, and then it’s your partner’s job to pass the ladder through the hatch to hand it over to you. Then, place the loft ladder on top of the previously installed support battens.
5) Make sure your partner checks the ladder is in its correct position and secured from below. Once you’re both happy, secure your new loft ladder to the edge of your loft’s entrance in the hatch using the screws. You can do this by attaching the ladder to a joist, as well using any hinges that have been provided by the manufacturer. Most commonly, ladders use a pivot arm at the top of the ladder or guide rails, which allows you to secure the structure in place. Check the instructions of your loft ladder which should explain precisely where the screws should go.
Tip: Ensure your loft ladder is the correct way up before you start to drill, as they can quite easily be wrong way up, in which case you’ll need to start over.
6) Now you’re all ready to finish up. Double check the ladder extends correctly, and that the legs of the ladder are the appropriate length. If you’re fitting a wooden loft ladder or a timber loft ladder, then you can trim the legs accordingly by carefully using your reciprocating saw.
Bear in mind that this is a general guide to fit your loft ladder, and steps may differ depending on the brand and type of your loft ladder. As a result, your loft ladder may have its own unique requirements that have not been covered in this guide.
At IronmongeryDirect, we offer a wide range of excellent loft ladders from industry-leading brands for you to choose from, including a Youngman Loft Ladder.