
Before you get started, here is what you’ll need:
5 x treated fence posts
Timber (treated) for the frame and rafters (the amount will depend on your requirements)
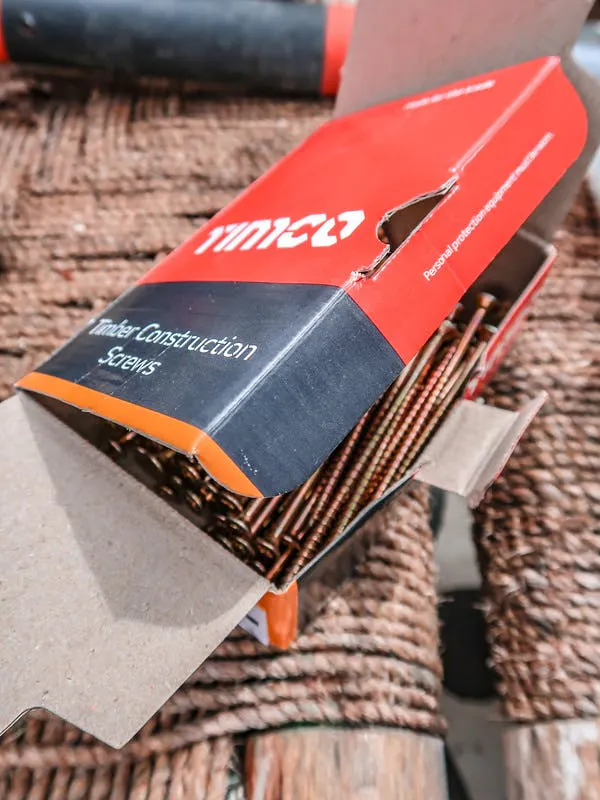
1 box Long timber construction screws
5 pack of Hex Bolts and nuts (as many as required)
Concrete
A range of tools (work bench, saw, spirit level, hammer, ladder, tape measure, clamps and ruler)
To make life easier, we’ve included links to all the products for this project that are available to buy online from IronmongeryDirect.
Measure Your Space
The first step is to measure and mark out the space that the Pergola will be built in, it can be as big, small, long or wide as you like, as long as you have sufficient space for functionality and structural support.
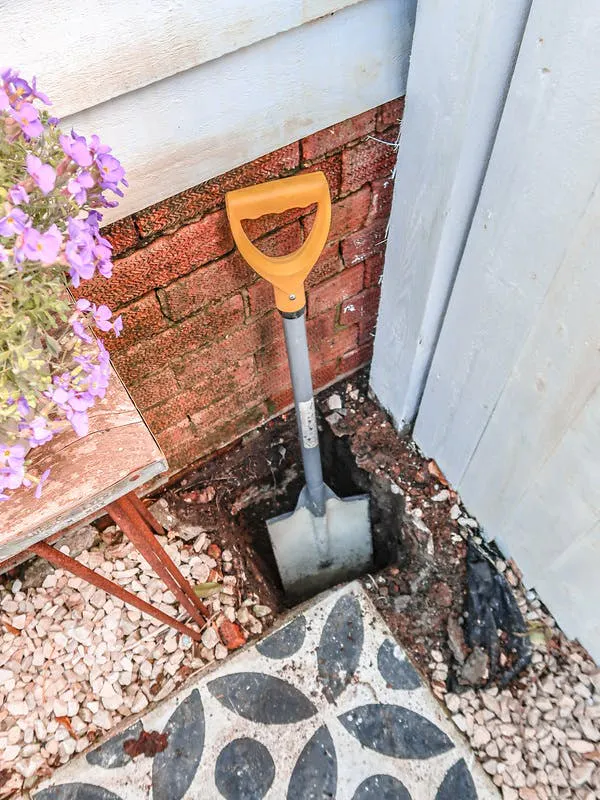
Time To Dig
When it comes to digging the holes for the fence posts to go in, the depth will be dependent on the length of the posts and the finished height you want the Pergola to be, but the general rule of thumb is that the holes should be at least 30cm deep. The holes should be laid out as 3 at the back and 2 at the front, to provide a solid structural base using the 5 fence posts.
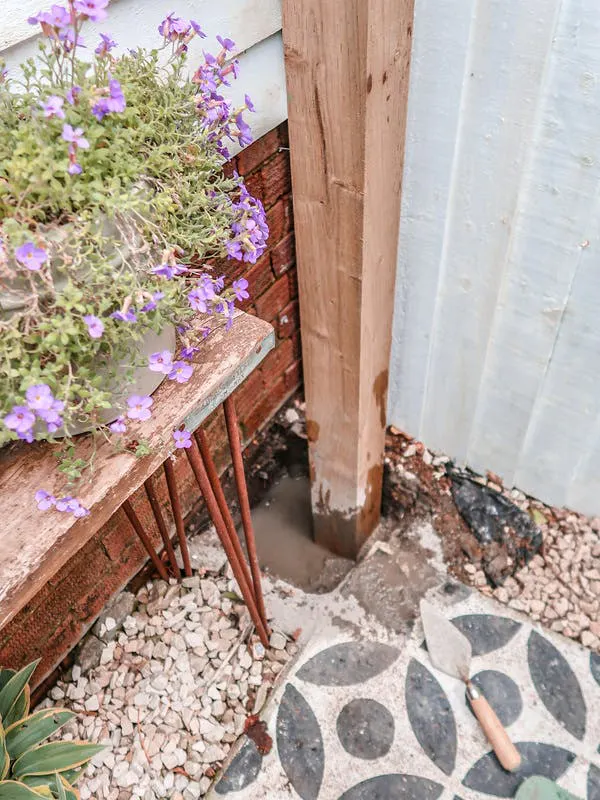
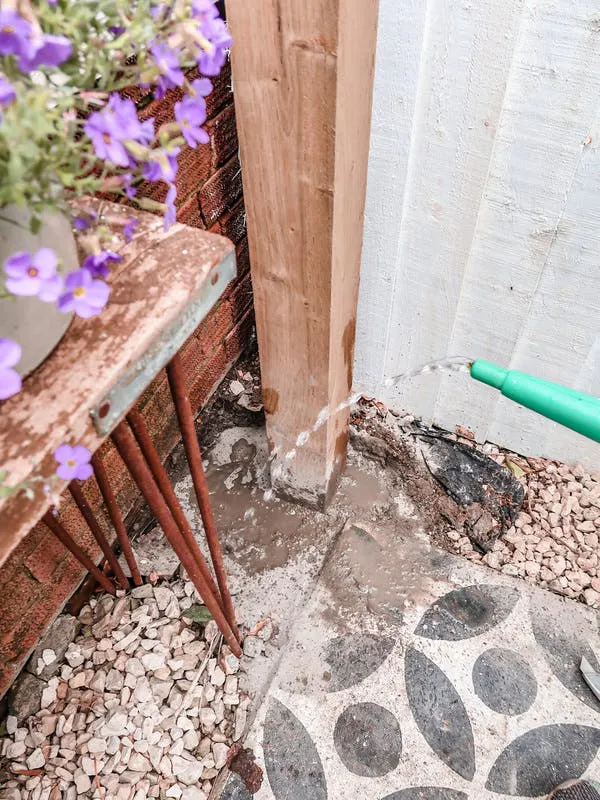
Then it’s time to place the posts in to the holes and secure them with the concrete, ensuring that you check that the posts are straight using a spirit level to maintain the structural integrity of the finished Pergola. Finally, use a piece of wood or string to square off the posts to make sure they are all lined up with each other.
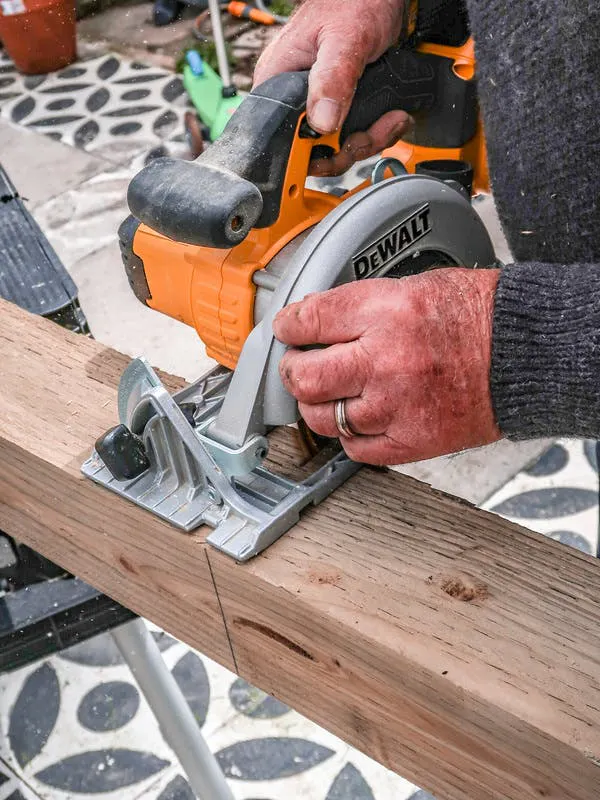
Secure The Outside Frame
Once the concrete has set, it’s time to get to work on the frame. Cut the timber to size to fit with the fence posts, then use the clamps to temporarily secure them to the posts.
Take the long timber screws and fix the frame to the posts, then remove the clamps.
Bear in mind, this method involves not having a post in the middle of the Pergola, so to compensate for this, we suggest doubling up on the framework to provide extra strength.
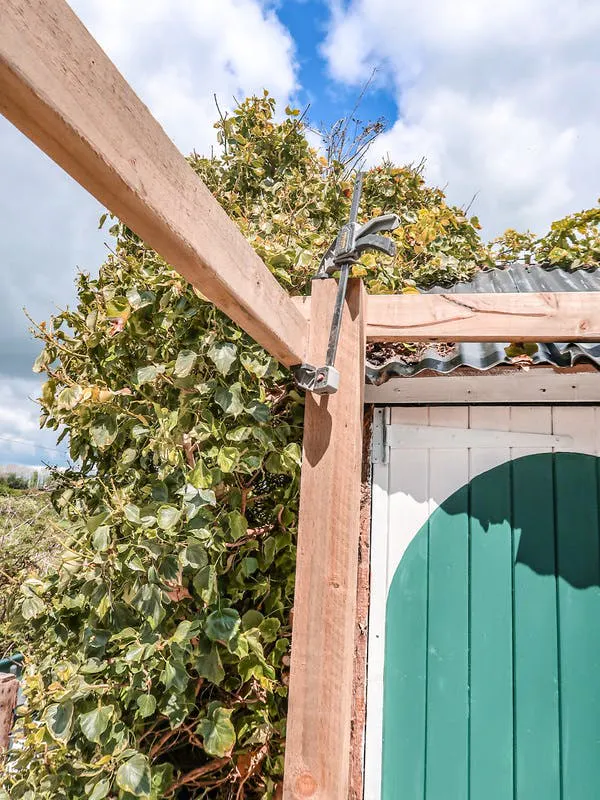
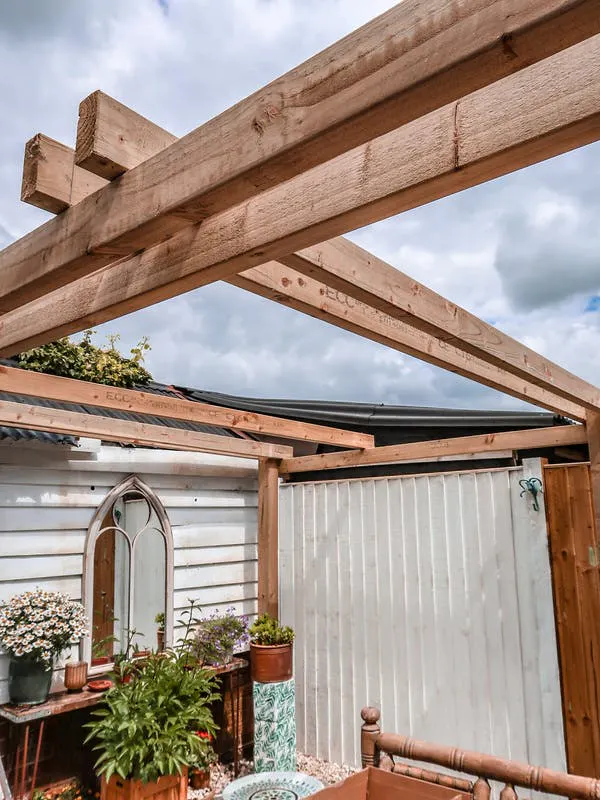
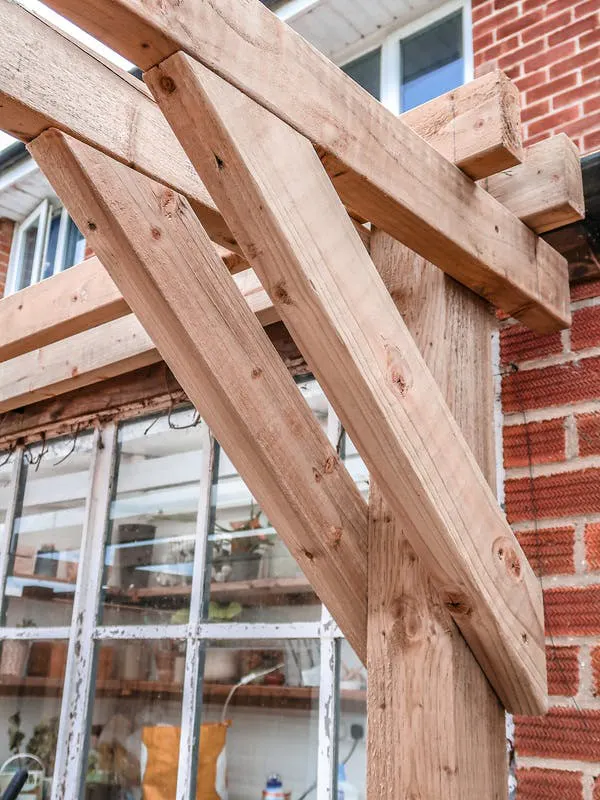
Adding The Rafters
Now it’s time to add the rafters, it is suggested that you work out the number of rafters you want/need ahead of time, so know exactly how much wood you’ll need before you start construction.
Your choice of rafters is down to you, providing they have the practical and structural benefits required. The most popular choices for securing rafters include overlapping them and securing them with bolts or flush then securing them with mini joist hangers. For extra security, you can add corner brackets to the framework.
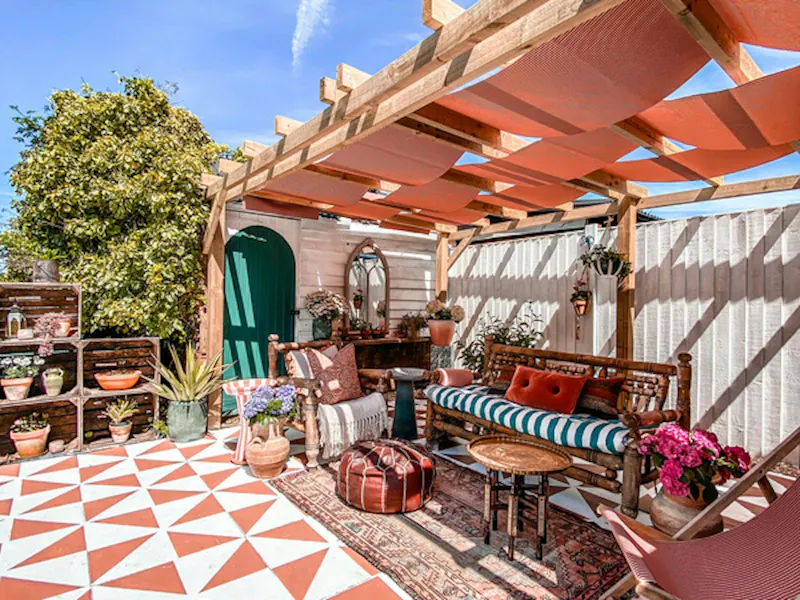
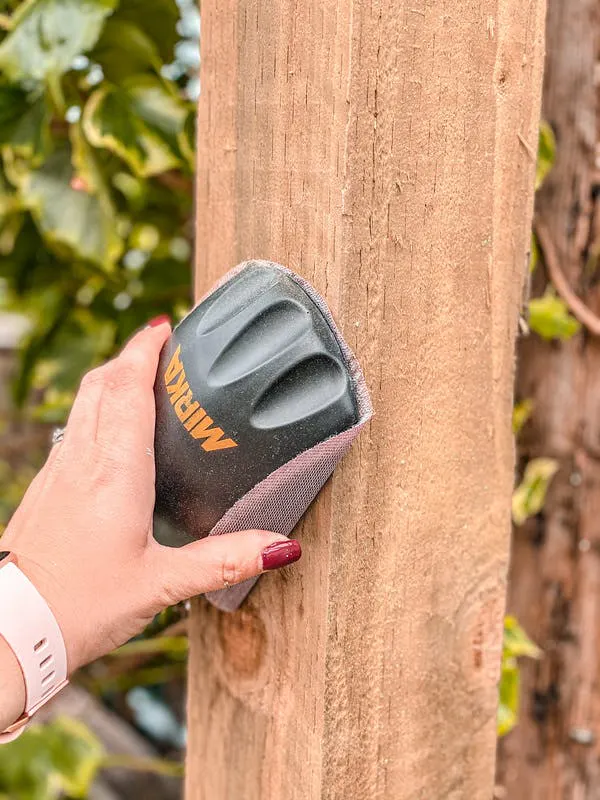
Finishing Touches
To finish of the Pergola, using the Dust-Free Sander, go over all of the framework to smooth out any rough edges for a cleaner finish. Then add decorative touches to suit your personal taste.
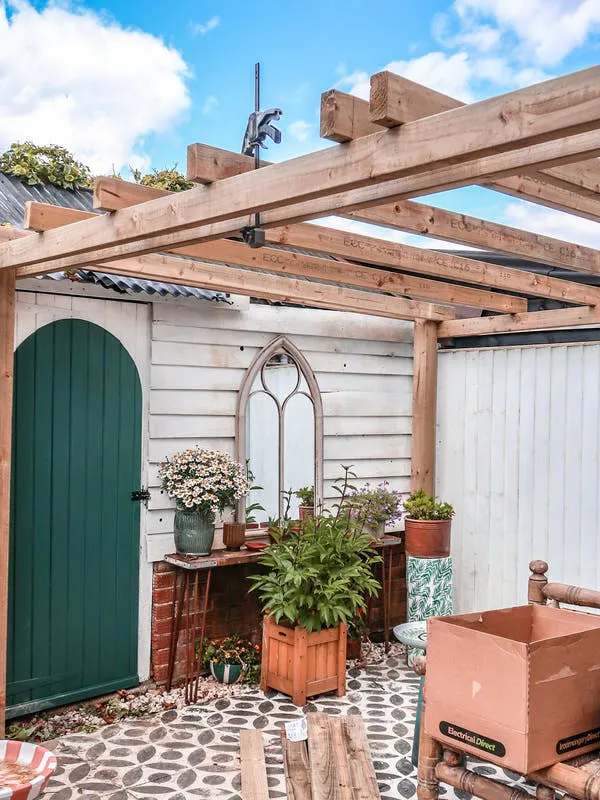
And that’s it, the Pergola is complete! Following this guide will make building a Pergola an absolute breeze, and with our top-quality products lending a helping hand, you can provide your clients with their perfect outdoor space!
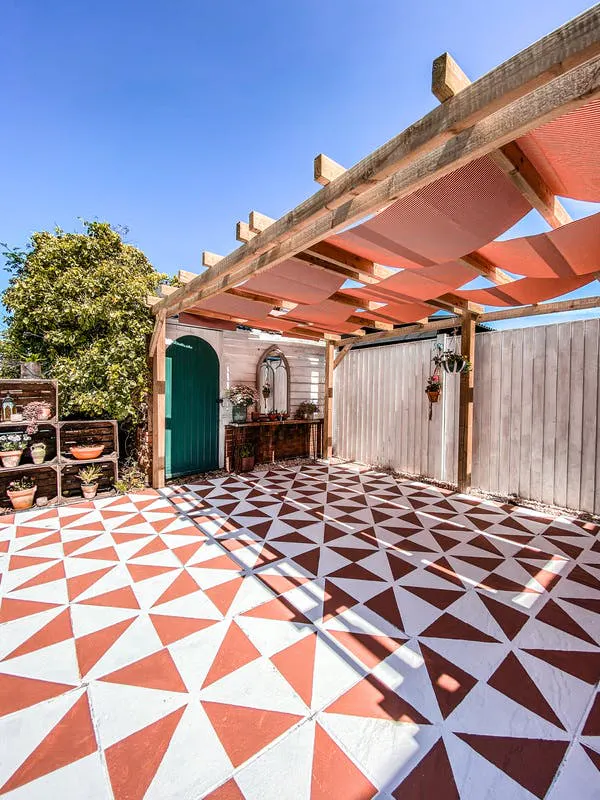
There are many ways to create a Pergola, this particular guide was inspired by @iamhayleystuart – find the original guide here. And to get some more inspiration for summer outdoor projects, check out our post here.
ALL IMAGE CREDIT TO: @iamhayleystuart