Over 1,700 prices just dropped - grab what you need for less today! Shop Now.

It’s important to plan your project before you dive in, so that you don’t end up making mistakes and wasting time and money. Measure your garden and sketch out your project on a piece of paper or on a computer.
Make sure you do it to some level of scale, with the correct dimensions, so everything fits how you intend it.
The next stage is to completely clear the space you’re going to be working in. By clearing your garden, you’ll have a better idea about how you can rework it.
Once this is done, you need to make sure that the ground is level, adding a combination of soil, sand and compost to flatten any dips.
Now you’ve got a flat garden, physically mark out your plan onto the ground. Used spray paint and draw on the grass where every aspect of the kitchen was going, to help visualise how everything would look together.
It's then time to work out exactly which tools and materials you’ll need. It helps to list out all the individual jobs that your kitchen will involve. Online calculators, such as this one, are useful for materials, helping you to decide how many bricks, flags and other pieces you will need for your project.
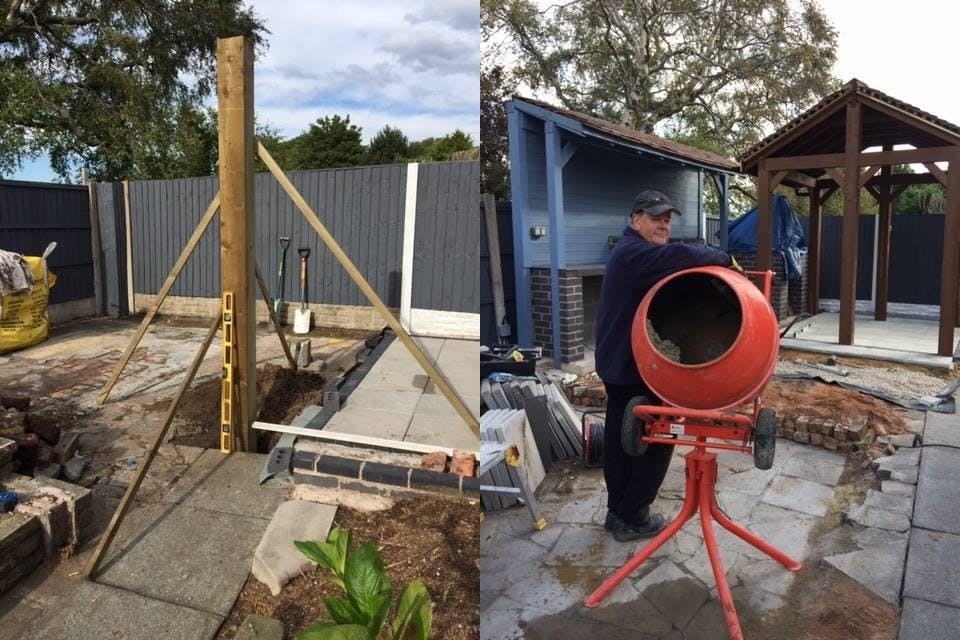
One of the pieces of kit you’ll definitely need is a cement mixer, which you can either hire or buy. Trying to mix the mortar and concrete by hand is back-breaking work and will take much longer, so a mixer is certainly advised.
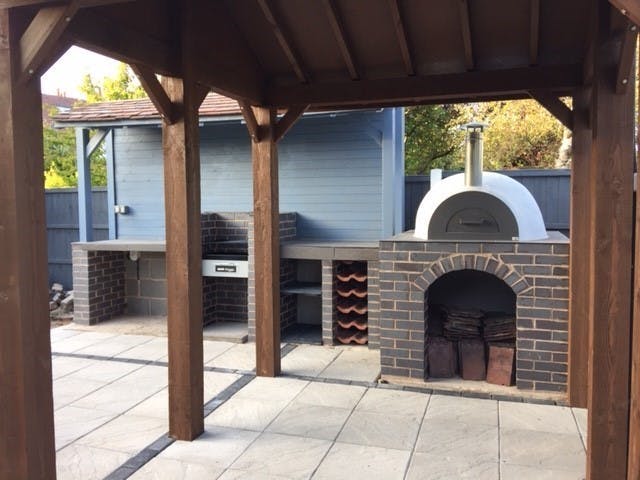
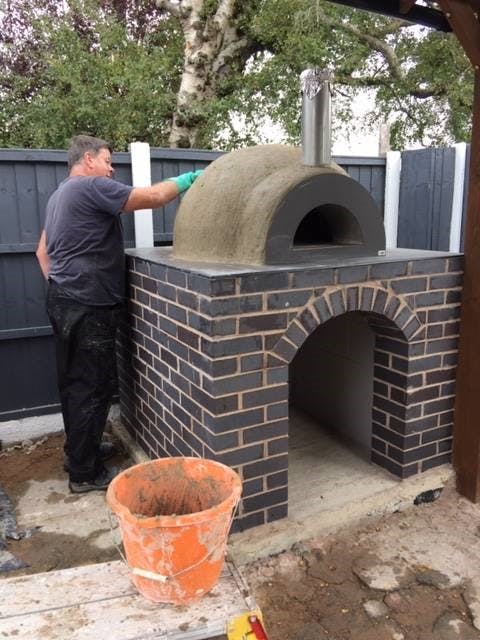
Use it to help you lay your foundations. You need to make sure they are of sufficient depth to support the weight of the brickwork and timbers, with the wood-fired oven and BBQ sections being particularly heavy.
Add a weed control membrane underneath the paving slabs to help stabilise the ground and prevent weeds from coming through.
Now it’s time to begin building! Practice setting out the bricks without the mortar first, then when you start for real, go slowly. Do it bit by bit so everything is aligned neatly.
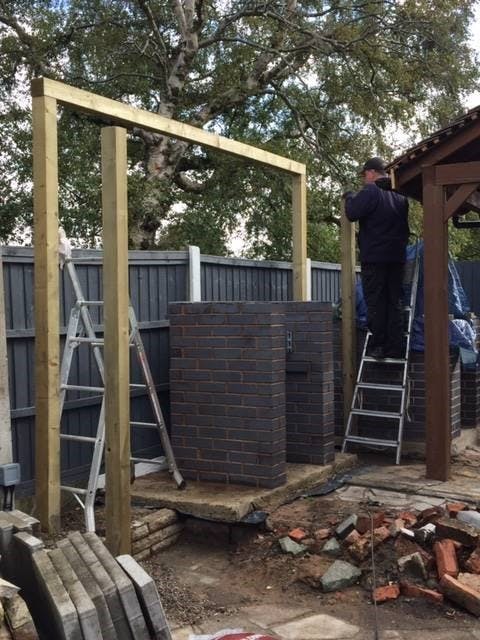
Once you have your structure in place, you need to add your roof. The first stage is to calculate the roof pitch and there are websites that can help with that, such as this one.
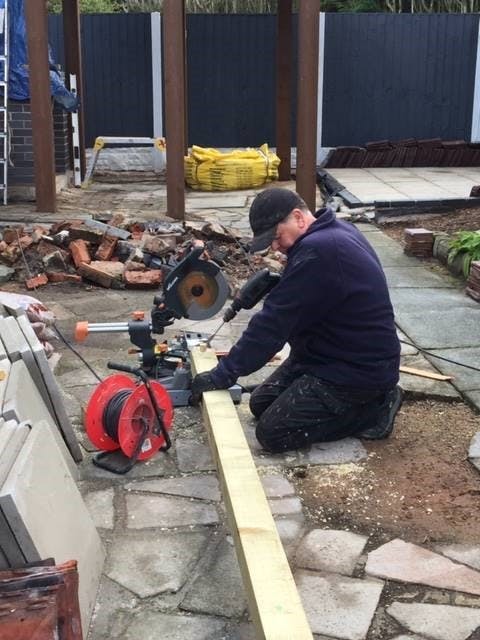
If you are not an experienced joiner, practice making the angles and joints for the roof using spare cuts of wood first, so you don’t waste any expensive timber.
Use marine ply with staining applied to give the wood a smooth but durable finish. Once this is done, add the membrane and battens on top, which supported the roof tiles.
If your roof has no drainage system, make a soakaway to take the surface water away from the kitchen area.
If you’re not a qualified electrician, hire one to wire up your kitchen. The risk of damage and injury is too great to attempt anything you’re not qualified to do.
Clear up your new kitchen space and check your local area to see if you can recycle any of your spare materials.
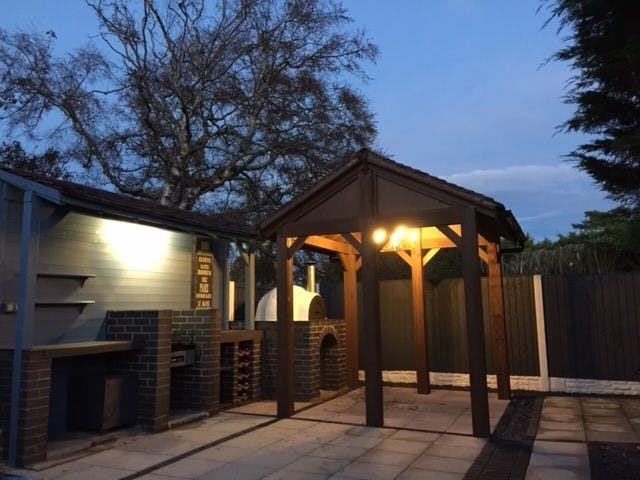
Now sit back, fire up your new oven and enjoy the luxury of having your very own outdoor kitchen!